When you go to your GP for a problem with your health they will sometimes refer you to a specialist. In the same way, when you have problems with your roofing it makes sense to employ specialist roofing firms rather than a general builder.
Of course there are plenty of roofing firms advertising their services but how do customers know that these are not general builders who know only the basics or have done some roofing work in the past and are now out of date and non-compliant with new standards? You need to look for the NFRC (National Federation of Roofing Contractors) badge.
Who are the NFRC?
The National Federation of Roofing Firms have been in existence for nearly 120 years and represent over 70 per cent of roofing firms by value. They are rightly regarded as ‘the voice’ of the roofing industry.
3 benefits of choosing NFRC-accredited roofing firms
Whether you need domestic, commercial/ industrial or specialist roofing work, by always hiring NFRC-accredited roofing firms you can be assured of the following:
1. Higher Standards
Roofing firms who have been assessed by the NFRC will have shown themselves to be financially stable, HSE compliant and able to work to exacting British and European quality standards. For roofing firms working within the domestic roofing sector, NFRC member contractors will be compliant with the government-endorsed TrustMark scheme.
2. Clear Quotations in Plain English
Some contractors take advantage of the general public’s ignorance about VAT to provide VAT-free quotations before whacking on an extra 20 per cent at the end. While VAT is a necessary part of any roofing work, an NFRC member is committed to making sure all costs are completely clear throughout the process and that all contracts are in plain language.
3. Extra Protection
As well as ensuring all contractor members are adequately insured, the NFRC also offer a range of specialist warranties for additional peace of mind. These are dependent on contractors also being registered with QANW so ask your contractor about this prior to hiring them.
So next time you need some roof repair or replacement work, look out for the NFRC badge. For more information on why you should always choose NFRC accredited roofing firms, see this NFRC guide.
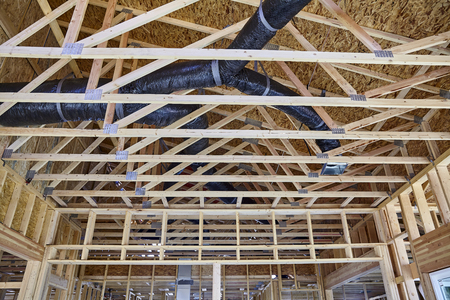
For many south west based business owners, investing in a new metal roof can be daunting since metal roof construction has little in common with any domestic roofing experience they might have previously had.
As we all know, contractors in all fields – and metal roof construction is no exception – tend to give better deals to those customers who know what they’re talking about so it is worthwhile getting your head around the basic concepts involved before you start talking to roofing firms or building contractors.
Metal Roof Construction Basics: 5 Types of System
The five basic types of metal roof construction system used in the UK are:
Single Skin
Double Skin
Secret Fix
Site-assembled Composites
Factory-assembled Composites
Single Skin Systems
Single skin systems are the most basic form of metal roof construction. They simply consist of sheets of uninsulated metal sheets (usually steel) fixed to metal purlins (supporting frames that run parallel to the eaves).
Basic Double Skin Systems
A double skin system, used in most industrial and commercial buildings, is comprised of at least three parts: An inner liner, an outer weather sheet and a spacing system that supports the weather sheet while making room for insulation – normally a mineral fibre quilt. The liners can be made of steel or aluminium.
The liner sheet will be thinner and the profile shallower than that of the weather sheet. The minimum thickness of a liner is typically 0.4mm (steel) or 0.5mm (aluminium) whereas the weather sheet will be at least 0.7mm (steel) or 0.9mm (aluminium) thick.
Both liner and weather sheet are usually trapezoidal (wavy – or ‘sinusoidal’ – profiles are rarely used in standard commercial metal roof construction any more).
Secret Fix Systems
Secret fix systems are double skin systems which have specially profiled weather sheets designed to hide most of the internal substructure and fasteners from view. They are popular in roofs with shallow slopes or where a pristine external appearance is desired.
Site-assembled Composites
Site-assembled composites are specially profiled to incorporate a rigid insulation. The insulation is normally either mineral fibres, polyisocyanurate or polyurethane.
Factory-assembled Composites
Rather than have the insulation installed onsite, some metal roof construction projects involve building the panels in a factory and then bringing them to the site fully-formed. Polyisocyanurate or polyurethane tend to be the preferred insulation materials used since these bond with the liner facings on expansion.
Special Liner Considerations
Sometimes it is necessary to add extra liners to the basic systems above. Two common examples are in food production/optimal hygiene environments and aggressive industrial processes, both which will require separate liners underneath but with different properties.
Some heavy traffic metal roofs will also require an extra walkable liner.
Standard Metal Roof Coatings
There are various coatings that can be applied to the substrate (i.e. metal) and these vary in terms of colour and finish depending on the roofing supply firm used. Steel will be hot-dip galvanised or aluzinc coated while aluminium is supplied with a mill or painted finish.
Common choices of coating include ARS (aluminium only), Multicoat, Plastisol (steel only), Polyester and Pvf2.
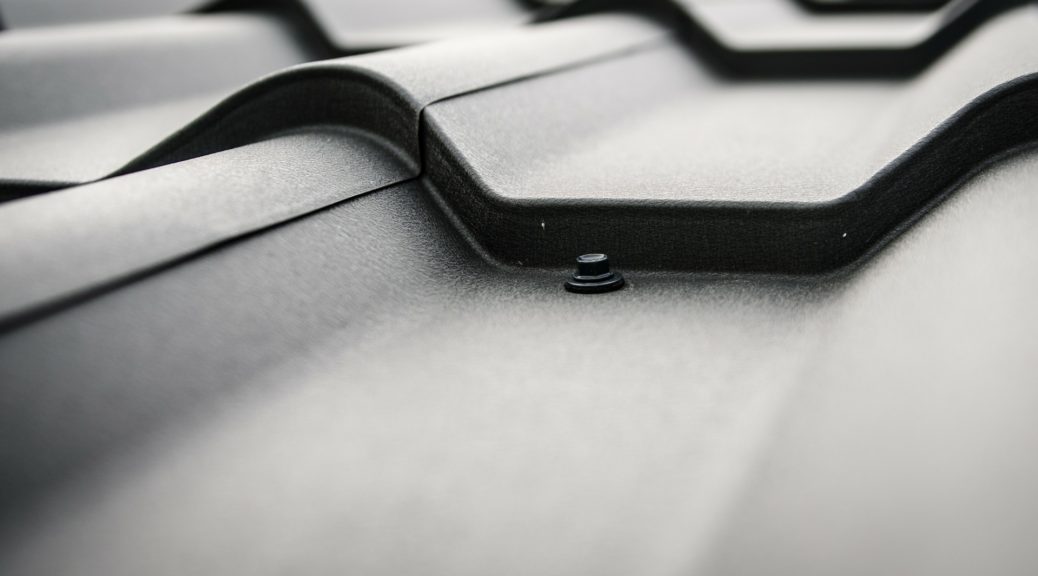
A Note on Fasteners
Most metal roof construction projects used to rely on typical zed spacers comprising of z-shaped steel fastened to nylon ferrules. While these may still be used in shallower roof constructions they have been largely replaced by various proprietary fasteners and bracket systems using structural grade steel and plastic. More detailed information on roofing fasteners can be found in our dedicated fastenings section.
Armed with the above basics, business owners should feel more confident when organising their own roofing projects, ensuring that the best decisions are being made in the interests of their business. For more in-depth information, visit: http://www.mcrma.co.uk
Have you ever visited the Eden Project in Cornwall? Walking around the rainforest biome is a source of endless inspiration for gardeners but did you know that many of the plants you see won’t do well in an average conservatory, particularly an older one.
The good news is that conservatory roof conversions can transform your growing environment into a far more successful growing climate for certain plants.
Which plants would benefit from a conservatory conversion?
1) Rubber. One of the most common plants that you might want to grow is the rubber plant. However, rubber plants are not fans of direct sunlight which is a problem if you have a traditional glass or polycarbonate roof. Modern conservatory roof replacements can switch your transparent roof for a tile-effect alternative. This includes insulation and does not require the extra foundational work required for a full conversion into a sunroom.
Without the constant glare of the sun, you should find that rubber plants are far happier and grow into more attractive specimens.
2) Banana. Providing you opt for the best species and bring them inside when the temperature drops below 14 degrees C, it is possible to grow bananas in the south west UK. But bananas don’t like extremes of temperature so if your conservatory shoots from boiling to freezing in an instant – as most old conservatories do – then your banana plants won’t thrive. Converting your conservatory will smooth out those extremes and you may well be surprised at the difference in your banana plants.
3) Bamboo. If you find that you are constantly watering your bamboo plants or see evidence of scorching at the edges of the leaves, it is a clear sign that your conservatory is too hot or that your plant is exposed to too much direct sunlight. As in the above examples, a conversion will sort out both of those issues in one go.
More and more people are realising that converting their conservatory roofs enables them – and their plants – to enjoy a more comfortable experience all year round.
If you’re thinking of turning a conservatory into an extension, don’t rush into it. It may seem a simple job of just getting rid of the glazing and maybe extending dwarf walls but you are asking for trouble – both structural and legal – if you don’t speak to your local authority and if you fail to do your homework first. For example, are you 100 per cent sure that your foundations will take a heavy extension (usually they won’t) and that the thermal properties of your extension will conform to the stringent new environmental considerations (ditto)?
The reasons why homeowners like turning a conservatory into an extension
One of the main problems with most conservatories is that they are only fully functional when the weather is within narrow limits. Whether you have a glazed or polycarbonate roof, there is little to stop the transfer of heat out of the room which means that once the sun goes down, any heat that has built up over the day will quickly dissipate. On the other hand, when the summer mid-day sun is shining down through your roof, it quickly heats up the surrounding air, largely due to the greenhouse effect which stops the sun’s rays escaping. After a while the conservatory becomes too hot to bear.
So one reason why homeowners prefer turning a conservatory into an extension is so they can use it all year round.
Some people accept the fact that one of their rooms is basically out of action for over half of the year until they make plans to sell it. Everybody knows that adding usable space to a house is the surest way to increase its value and it makes perfect sense for the outgoing owners to begin converting their part-time conservatory into a full-time reception room – or even a bedroom.
Electrical items are also a problem when you have a conservatory. Almost all electrical items will warn you against exposing them to extreme fluctuations in temperature which makes most conservatories an absolute no-no. That’s even before you get to the issue of excessive glare and UV damage.
Ultra-violet rays from the sun are also behind the fading and bleaching damage that you see on fabrics and other sensitive materials used in a conservatory – there is a reason why you only tend to find plants and rattan furniture in a conservatory!
If at this stage you’re getting depressed about your prospects of turning a conservatory into an extension then the good news is…there is another way!
Alternatives to turning a conservatory into an extension
If turning a conservatory into an extension seems a bit of a headache then there are alternatives. Conservatory roof conversions for example give you many of the temperature conserving benefits with minimal structural changes and no red tape to wade through with Building Regulations.
There are now several kinds of specialist lightweight roofing systems, complete with insulation, designed to be used with conservatories (for example see our Supalite roof review). These roofing systems are solid and opaque, preventing both glare and the direct transference of sunlight. They also have a much lower u-value than glass or polycarbonate which means they transfer heat only slowly, stabilising the temperature within the room, even when the sun has gone down.
Conservatory roof conversions are a compromise between the convenience and cost of a conservatory and the comfort and economy of an extension.
However, if you do decide you would prefer to go the whole hog and can afford the time and expense it takes when turning a conservatory into an extension then this video gives some idea of the process…good luck and enjoy.
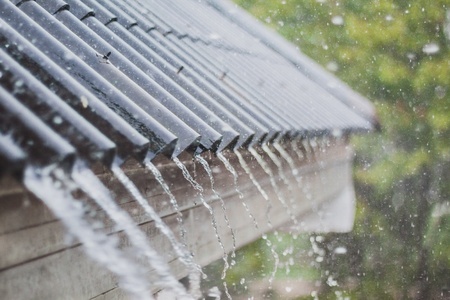
When we think about the battering our roofs get over the winter months we usually focus on the risk of damage from torrential rain, howling gales and even the odd lightning strike. Hail damage is usually beneath the radar, partly because most of the hail we get down in the south west is petits pois-sized. But with man-made climate change supposedly increasing the likelihood of freak weather conditions perhaps it’s time we thought about what conditions lead to hail damage andhow we can check if our roofs have suffered any hail damage.
The good news is that hail under an inch in diameter (say 10p size) is unlikely to cause any problems unless the roof is really degraded. Even the softest asphalt shingles can usually withstand hailstones below this size. But what about the rare occasion when the sky starts raining golf balls?
There are many factors that will affect the type and extent of hail damage. These can broadly be split into weather conditions and roof conditions.
Weather conditions include:
Size of the hailstones
Their speed
Their density
Their direction of travel
Their shape (hailstones are rarely smooth but some are more jagged than others)
Roof conditions include:
Roof materials
Age of roof
State of repair
Pitch
Number of shingle/tile layers (shingles on shingles are more susceptible than shingles on wood)
In terms of roof materials, shingles are the most likely to suffer hail damage but while harder materials such as wood and clay can withstand all but the big tennis ball size hailstones, they tend to crack or shatter completely when they are damaged.
Inspecting a Roof for Hail Damage
One of the main problems with hail damage is becoming aware of it in the first place. Since we can’t see our roofs – or at least the entire roof – from ground level it can sustain a lot of damage without us noticing. Sometimes it is damage to rainwater goods that first alert us to a problem or evidence from a shed roof or external fixture.
We would always recommend that if you want a proper roof inspection for any reason, including hail damage, then it is best to get an experienced roofing firm in.
If you do decide to take a peek yourself, make sure you follow all the usual safety guidelines including wearing soft rubber-soled shoes and a good quality ladder that is high enough to extend above the eaves (never stand on any rungs above the eaves).
Metal most readily show the signs of hail damage so start by looking at your flashing and any metal vents for dents and discolouration. As mentioned above, wood and clay tiles are likely to crack or shatter and you should see dent marks at the point of impact along with some staining – often a brown/orange colour.
Shingles can be trickier to inspect with some signs of hail damage very subtle. Be on the lookout for bald patches where the granules have been displaced on impact. You may then start to notice dents, fractures and tears.
What are the Implications of Hail Damage?
The integrity of your roof is dependant on all of the structure and materials keeping their integrity. While a cracked clay tile looks more serious and should prompt a replacement, displaced granules on shingle tiles can be as bad if not worse. Exposing the shingle beneath to direct sunlight will accelerate its degradation and over time it will begin to crack and blister, losing its ability to keep out water. Algae will also establish a foothold until, before long, the entire roof is compromised leading to water ingress and disinterested insurers who will tell you you should have checked and maintained your roof properly!
To avoid this unwanted scenario, get a roofing firm to give your roof the once over if you suspect hail damage.
Before even thinking about how to roof a house, you need to ask yourself the question, why roof a house yourself. Roofing is seriously hard work and carries with it the risk of death and serious injury not to mention the onslaught of Mother Nature whether that be howling winds, driving rains or sweltering heat. You will also need to comply with Building Regulations to ensure you are using materials with the right thermal insulation and fire retardant properties.
NB: This guide covering how to roof a house only covers pitched roofs using shingles. Other guides will be published soon. If your house is very tall or your roof very steep the best advice is forget it – get a professional roofing firm in.
If your roof is not that far from the ground and relatively shallow, we recommend reading the safety advice below (see Part 1) and then following this three step test:
Step 1. The Height Test
Obviously, if you are considering roofing your own house you should be comfortable with heights. That means not just clambering up a ladder but moving around on a roof without your knees knocking together or your stomach in your throat. Check the safety advice below (in particular securing the roof, checking/setting your ladders and buying a fall protection kit) and then make a few exploratory forays on your roof. If you are still confident that the height isn’t going to deter you, move on to the second step:
Step 2. The Strength Test
Visit your friendly local roofing supply outlet and practice carrying things such as rolls of felt paper and shingles. Don’t carry loads more than 20kg in weight and please read the manual handling advice from the CITB before performing the Strength Test.
Disclaimer: We can not be responsible for any injuries caused by following this guidance without informing yourself on correct manual handling techniques.
Step 3. The Height and Fitness Test
If you pass this next step you might do well to consider a career in the roofing trade!
Re-read the manual handling advice in Step 2 and the safety advice in Part One (below) and then practise safely carrying some roofing materials up and down your ladders and along your roof.
Still want to roof a house? Then follow the guidance below.
Please note that this is not the only way to roof a house or even necessarily the best way to roof a house!
How to Roof a House Part One: Safety
For a comprehensive guide to safe roofing, see this brochure.
Your biggest ally when it comes to safety in roofing (and with any maintenance or DIY project) is to use good, old-fashioned common sense. If you feel like taking a risk, remind yourself of the potential consequences (death, paralysis, grief for your children and/or your significant other) and make the right decision.
Pay attention to your footwear. You want as much traction as possible so opt for shoes with a soft rubber sole.
Make sure your roof is as clean and free from dirt and debris as possible before beginning your roofing project.
Ensure everyone in the vicinity is wearing hard hats in case tools are dropped; children and pets should be kept well away from the area.
Set up a covered chute into a skip/waste bucket for rubbish. If this is not possible, at least make sure you look down and give a clear shout before dropping anything from the roof.
Ensure there are no trailing cords or ropes on the roof at any time; these are dangerous tripping hazards.
Set up scaffolding for installing the drip edge and first courses of tiles.
Check the load capacity of your ladders. They should be able to support your weight plus an extra 80 pounds.
Always extend your ladder three feet above the eaves and never
stand on any rungs above the eaves.
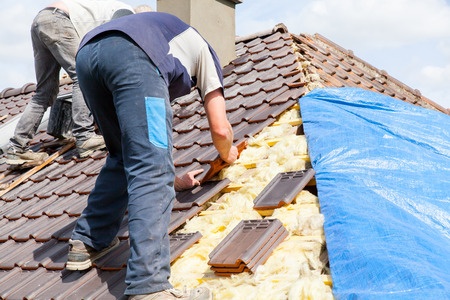
How to Roof a House Part Two: Stripping
Once you’ve familiarised yourself with the safety instructions above and any other manual handling and health and safety guidance/legislation, it is time to strip the existing roof down to the decking. Pick a dry day to do this where possible. Some sources recommend working in sections whereas others advise to strip the whole roof first.
Using a roofing shovel (or a garden fork) remove the ridge caps and shingles, starting from the edge furthest from the skip and working down from peak to eaves in sections. Be careful of any rotted decking as you move about on the roof. (this will also need to be repaired before you move forwards of course).
The felt paper should come off pretty easily but you may find that some of the previous underlayment is so degraded that it won’t shift. In most cases it is fine to leave small pieces in situ but make sure that you remove or flatten any existing nails and staples.
How to Roof a House Part Three: The Drip Edge
The drip edge overhangs the fascia and prevents shingles from curling over the roof edge, causing water to soak in behind the fascia. This can lead to the fascia rotting, stains on the walls and, in extreme cases, erosion on the ground which can threaten foundations. A drip edge also prevents insects from entering between the fascia and decking and gives the roof a neat finish.
Install your drip edge along the eaves in sections, working up the roof, and nailing to the deck every couple of feet.
How to Roof a House Part Four: The Underlayment
Self-stick underlayment protects the decking from rain and ice and many premium brands also offer the shingles some protection from wood resins in the decking. Underlayment is designed to be breathable to allow moisture to escape. The sticky backing is split into two so that you can peel the top part off while leaving the bottom part covered.
Your underlayment should come with specific instructions but, if not, here is a general guide to laying:
First, line up your first roll with its bottom edge along the drip edge. Nail the top corner (furthest from the eaves) to the deck and unroll the underlayment, removing the top part of the backing as you go and making sure that it sticks down flat. If the pitch of your roof is steep, you may need to work in ten foot sections to prevent slippage. If the weather is particularly cold, you may find the underlayment refuses to stay put. In this case, use nails or staples to fix it down. Once the top has been stuck down, remove the bottom half of the backing and stick the rest of the underlayment down. Each course (or lap) of underlayment should overlap by two inches but most brands of underlayment will include a helpful marked guideline to assist with this. If you need to start a new roll mid-course, you should overlap the edges by four inches and hips and ridges should be overlapped by at least six inches.
It is really important to ensure that your underlayment is flat; uneven underlayment will cause noticeable warping when the tiles have been laid.
How far in from the edge your underlayment will have to go may vary depending on location, so check with Building Regulations.
How to Roof a House Part Five: The Felt Paper
Felt paper (also known as tar paper or builders’ paper) adds more water and fire protection. One thing amateur roofers need to know about felt paper is that it is prone to tearing which can be very hazardous when walking along the roof. If your roof is very steep or you expect to be working for a few days, it is wise to invest in the heavier 30 pound paper as it is less likely to tear and wrinkle than the 15 pound paper. Felt paper covers the entire roof.
To start with, unroll a short section and secure it to the deckingt with a dozen or more staples in the centre.This can then be used as a pivot point for aligning your sheet. Work with sections of around ten feet in length at a time, stapling at least every foot (you may need to use nails if the roof is steep or weather windy). In windy conditions, never hold large pieces of unsecured felt paper (i.e no more than 25 feet); this can catch the wind and cause you to lose your footing. Overlap the paper at the ridge from both sides for an extra watertight seal. Don’t put felt paper over any valleys yet as you will need to waterproof them first.
How to Roof a House Part Six: Waterproofing Valleys (Open system)
Underlayment is the first consideration when waterproofing the valleys. It is easiest with two people working together as you can hold the underlayment away from the roof, remove both sides of the backing and position carefully in place, making sure you really push the material into the crease of the valley. What you don’t want to do is to create a baggy area above the crease as this will be prone to tearing. As always, overlap each piece as you travel down the valley and cut off the excess. Allow the material to overhang the eaves (nailing it at the edges) but not to extend past the gutter. Next, line up the valley metal and nail it in place when you’re satisfied. Now you can continue to lay felt paper up to the underlayment, being careful not to cut the underlayment when trimming. As mentioned in the video, if you are using the open system, you will create a metal channel when laying the shingles. You should allow this to widen by around an eighth of an inch every foot down the run.
How to Roof a House Part Seven: Starter Shingles
Starter shingles fulfil an important role. They prevent water seeping straight through to the underlayment and, since they are only half the width of standard shingles, they prevent an unsightly lump on the edge of your roof. Overlap your starter shingles about three-quarters of an inch over your drip edge and secure with five nails about two to three inches back from the eaves. Starter shingles have an adhesive strip on one side; this should be uppermost as it will stick to the first full course of shingles and improve water resistance. For a professional touch, consider adding starter shingles along the gable edge making sure they extend half an inch past the drip edge and two to three inches over the eaves.
How to Roof a House Part Eight: Shingle Installation
Now your roof should be really starting to take shape. Take care with this part of the project since most problems with roofs come about through shoddy work at this stage. Secure your first row to the starter shingles according to the manufacturer’s recommended layout and nailing pattern. If there isn’t one (or you can’t find it), a general guide is to use around six zinc-coated nails which should be long enough to protrude at least three-quarters of an inch into the decking; nails should be driven in about an inch from either side and covered by an inch or more of the shingle above. Make sure nails are flush and use a pneumatic nailer where possible (with a hammer as back-up). Never use staples!
Once your first full row has been laid you will need to measure the reveal – that is the portion of tile exposed between rows – and set up lines every few rows to keep your shingles relatively level (a slight waviness isn’t a major issue). Work your way up both sides simultaneously towards the peak (going right to left if right-handed), using partial shingles (cut with the hook attachment on a Stanley knife). When within eight feet of the peak, measure the distance to the uppermost row of tiles and work out what the final reveals will be. If one side is a lot bigger than the other, snap lines to progressively bring down the difference (adjusting by no more than 3/16 of an inch per row). Overlap shingles at the ridge (as you did with the felt paper) and go long into the valleys and over hip ridges and rakes (the side by the gable end).
Once the shingles have all been laid, draw a line down the edge and trim the shingles along it using the hook.
How to Roof a House Part Nine: Dormer flashing
Although it is sometimes possible to reuse existing dormer flashing it is better practice to rip it all off and start again. That way you know there is no hidden corrosion or rot. Begin by laying underlayment so that it covers the bottom of the front dormer wall by about six inches. Do the same to the side walls, overlapping the front by about an inch. Next, lay shingles right up to the foot of the dormer before adding flashing to the front, nailing through both shingles and decking. You want to extend the base of the flashing a little way past the front of the dormer but cut the vertical portion flush. When you install the first piece of flashing beside the side dormer wall, cut into the join so you can bend the top portion around the corner, remembering to add sealant to the edge before you hammer it flat. Next you lay a row of shingles over this portion of flashing and then lay the next portion of flashing over those shingles and so on. Only nail the flashing to the dormer wall (and only on the end closest to the peak each time so you are covering the nails with each piece).
How to Roof a House Part Ten: Dealing with Stacks and Vents
Here is the standard method for dealing with stacks (or any other protrusions from your roof) and vents (or any other holes into your roof space). Vents don’t need underlayment but stacks do, so cut a two to three foot piece of underlayment per stack. You want your underlayment to fit snuggly around any stacks so cut a hole that is smaller than the stack, pushing the underlayment down over the stack and into place so that it overlaps the bottom of the stack. You can then just cut an over-sized hole in the felt paper as you roll it over, remembering to cut holes for the vents too. Caulk the pipes/stacks and then lay shingles half-way past each one. Nail flashing over that row of shingles – top and bottom – seal the nail holes and continue with the shingles, using the hook attachment on a stanley knife to cut them around the stack. To improve the look of your roof, spray any protrusions to match. You should also check that your roof has adequate ventilation as now is the time to saw some more holes in the decking if necessary.
How to Roof a House Part Eleven: Capping the Ridge
If you have a hipped roof, you will need to cap the hips first before the ridge. In both cases, draw chalk lines either side of the ridge but take them in a little so that your tiles will cover it. It doesn’t matter at what end you start capping but make sure that the prevailing winds flow over the shingles rather than against them (think stroking a cat!) You will usually need extra long nails to go through all the shingles below, particularly if you opt for the double thickness architectural caps. Put your nails in about an inch above the seam on either side. The top half of each end shingle can be torn off and a nail hammered in on either side to secure.
How to Roof a House Part Twelve: Finishing Off
Congratulations, you’re almost there. Sweep all the debris off the roof (following all the safety precautions above to protect anybody who might be below) and use a proper roofers’ sealant on any exposed nails (e.g. on the vent and stack flashing). A roof is exposed to all that nature can throw at it and many silicone or asphalt-based sealants just aren’t up to the job.
And there you have it, one way to roof a house. Watch this space as we will be seeing how theory meets practice by going out with a south west roofing company and taking some video footage.
If you want to quickly and relatively cheaply increase the value of your home, a roof conversion – in other words, converting your ‘loft’ into some kind of usable space – is one of the common recommendations by the experts. As well as being relatively unobtrusive, roof conversion almost always costs considerably less than the increase in value it provides, but what prices can you expect to pay?
SWRCN did a bit of research and dug out a few guideline prices. Since all of the averages mentioned below included London-based conversions, homeowners in the South West can probably look more towards the middle of the ranges given.
Roof Conversion Type One: The Basic Conversion
This is the least expensive type of roof conversion whereby you are only looking for a bit of extra space with usable flooring and maybe a new ladder and hatch system. It won’t add much in terms of value but extra space usually helps to sell a house and a basic conversion can cost as little as £700 through a specialist loft conversion company. There are some such companies, mainly London-based, who claim to be able to convert a loft in as little as a day!
Roof Conversion Type Two: The Velux® Conversion
Velux® conversions like Hoover® vacuum cleaners are an example whereby one brand has become so successful at marketing itself that their name has been entwined with their products in common language. Velux® are a huge windows and blinds brand but they are most commonly associated with the skylight windows that help turn a dusty old loft into a bedroom, bathroom or spare room.
The cost of a Velux® conversion will depend on what you intend the final room to be. For example, a bathroom will require extra plumbing. As a guide, you are looking at £15 000 to £20 000 for this type of conversion and planning permission is not normally needed unless you are adding over 40 cubic metres of extra space.
Roof Conversion Type Three: The Dormer Conversion
A dormer conversion (pictured) maximises space by extending the normal height of a room outside of the roof. It is possible for a dormer to be constructed under permitted development but planning permission may be required in some cases.
A dormer conversion is likely to cost between £25 000 and £35 000 (or £1 150 to £1 350 per square metre)¹.
Roof Conversion Type Four: The Hip to Gable Conversion
For even more space, some homeowners opt for a hip to gable roof conversion. These involve replacing one of the sloping portions of a traditional hipped roof with an extended wall at the gable end. You can expect to pay between £30 000 and £35 000 for this type of work.
Whatever type of roof conversion you opt for, and however you use the resultant space (bedrooms are popular due to their effect on house value), the most important factor is that the job is completed to the highest standard possible. A shoddy job will not realise the maximum added value and can even, in the worst cases, reduce the value of your home.
How your Architect Can Help
Your architect is more than just the guy (or girl) who draws nice room plans. He or she has a wealth of connections within the trade and should be able to recommend a number of builders or roofing companies who can handle the type of roof conversion you want. Once you have your shortlist (no less than three if possible), it’s just a case of getting in the quotes. Your chosen builder should be willing and able to fulfil all their duties under the Party Wall Act (where applicable) and other Building Regulations requirements; to only ask for payment once the completion certificate has been issued and to be liable to a penalty clause should deadlines be missed.
An Important Note on VAT
Builders are notorious for producing ex-VAT quotations and then flooring homeowners when the final bill comes in. VAT is now 20% – one-fifth of the net cost so don’t forget to check your quotations very carefully and ask for clarification if you don’t understand anything.
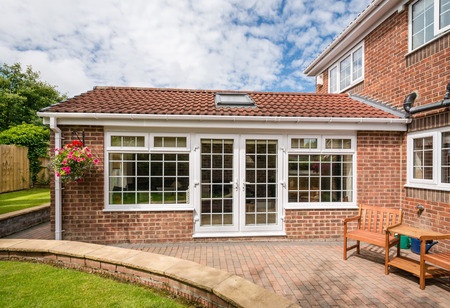
One type of roof conversion you may not have thought about, but that can definitely add value to your home (as well as transforming your living conditions) is a conservatory roof conversion. This entails replacing your current roof, whatever it is constructed from, with a lightweight, insulated roof that changes your conservatory into a comfortable space all year round. People who have had conservatory roof conversions find that winters are warmer and summers are cooler. Rather than avoiding the conservatory in the winter, they can continue to use it all year round.
In effect, a conservatory roof conversion provides most of the benefits of a sunroom without the need for planning permission and is only possible due to the development of lightweight roofing technologies which mean that there is no increase in pressure and so no need to deepen existing foundations.
Sourcing roofing supply in Devon and Cornwall throws up plenty of choice for the DIYer or tradesperson – perhaps too much choice! We have picked out three of the roofing supply specialists that stand out from the crowd plus a further three that might be worth a look.
If you think that another roofing supply firm deserves a mention please contact us and tell us why and we will consider adding them to the list. Any insider trade tips or customer feedback are also welcome.
Roofing Superstore, based in Plymouth, have hauled the roofing trade into the 21st Century with their professional e-commerce platform that offers a wide selection of products spanning every aspect of roofing. Importantly, the directors of the firm are not from an IT or management background but have over 25 year’s trade experience working for both a large plc and a small independent merchant. In other words, they should know what their trade customers need and want (they also supply to DIYers too). Along with the efficiency savings that come with e-commerce, Roofing Superstore claim that their service is better for the environment as most products are supplied direct from manufacturers using national couriers and pallet companies.
Jewson are, of course, one of the foremost names in the supply of timber and building materials, including roofing supplies and roof tiles. From Penzance to Bristol, wherever you are located in the South West you won’t be far from one of Jewson’s more than 600 nationwide stores.
If you prefer your roofing supply to come from an established brand then you can’t go far wrong with Jewson who opened their first store way back in 1836.
Based in Exeter, Roofing Supplies (SW) Ltd. are well placed to serve Devon and have recently revamped their website which now includes a daily ‘Best Lead Price’ feature and a monthly blog feature written by Nicola Sage. This covers everything from product reviews to how to address roofing problems such as keeping the birds away or removing moss. The website is a fully-functional, easy to navigate e-commerce platform where you can easily find prices, delivery details, stock status and product reviews. Roofing Supplies (SW) Ltd. also provide a price match service.
Roofing Supply Services Worth a Look
If you are after roofing supplies and/or power tools and can make it to Newton Abbot, then make sure you pop in to Supa Roofing & Power Tools Ltd. Trading since 1971, Supa branched into the power tools trade in response to customer demand, in 2000. They stock a full range of roofing materials, fixtures and fittings plus power tools from Trend, Bosch, DeWalt and Makita among others. Trade and DIY customers are welcome.
For a wide selection of roof slates from as far apart as Spain, Brazil and China get in touch with Westcountry Slate Supplies Ltd. This firm, which has depots in Exeter, Torquay and Redruth, also specialise in reclaimed tiles to help you match roofing styles.
Last, but not least, is Kenyon Canopy Ltd. from Saltash. This family-run business has been in operation for 20 years and boasts staff with over 50 years in the trade. They offer free delivery on advanced orders and supply both the trade and private buyers.
Inside Knowledge:
If you have a tip on roofing supply – perhaps you know where the best clay tiles for your money can be found or which firms go that extra mile for their customers – please let us know. We will feature your tips here.
Not all roofs are alike and whether you’re building a home from scratch or looking at having a roof retrofitted, it is a good idea to understand the many functions of a roof and what roof types (e.g. hip roof, gable roof, flat roof, dome, etc.) are best suited to your project.
Your choice of roofing should depend on many different factors including:
physical protection from wind, rain and snow
stability
available space
ventilation
heat and energy efficiency
light
appearance
cost
complexity
To help you to make a decision, we have created this new series all about roof types. The first in the series is the hip roof.
What is a hip roof?
A hip roof (or hipped roof) is a roof which slopes on all four sides into either a pyramid or, more commonly, a triangular prism with a ridge along its centre. A simple hip roof contains two triangle sides (hip ends) and two polygons.
The advantages of a hip roof
Compared to a gable roof, which can suffer in wild weather, a hipped roof provides excellent protection from the wind, rain and snow. However, attention must be paid to the angle of the faces if you live in an area prone to high winds, such as exposed coastal regions. In such cases, the angle of the sides should always be more than 35 degrees to avoid the risk of uplift. Shallower slopes can cause the hip roof to act like an aeroplane wing, trying to lift off in strong winds!
A hip roof is one of the most stable and sturdy types of roof you can choose being self-bracing with all four sides sloping in towards the centre. A hip roof is suitable for all sorts of different floor plans and its even edges make fitting rainwater goods quite simple.
A hip roof provides good ventilation and can be extremely energy-efficient if constructed and insulated well. Hip roofs are also popular due to their appearance, being regularly seen on cottages and bungalows.
The disadvantages of a hip roof
The main disadvantage of hip roofs is their cost. a lot of materials are needed to build a hip roof and the complex construction of the rafters and trusses is also labour intensive meaning high labour costs. Some people are tempted to cut down costs by employing cheaper roofers but this is often false economy as poor construction can lead to leaking ridges and other problems.
Another issue with hip roofs can be the lack of flexibility within the structure. Unlike a gable roof, which can easily incorporate a window on the end, a hip roof will need to be designed at the outset to incorporate a dormer as alterations later on will be very expensive.
Variations on hip roofs
There are various different types of hip roof that may be of interest depending on your roofing needs. These include:
Cross-hip roofs – These are a combination of two hip roofs with the ridges at right-angles to one another. The joins between the hip roofs are called valleys.
Half-hipped roofs – This is basically a hip on top of a gable end which is constructed by shortening the hip ends in relation to the sides. It is a popular design in the South East.
Gablet – This is a small gable on top of a hip roof.
Tented roof – A steep angled hipped roof ending in a point (common on churches)
What other roofs would you like to know more about? Leave a response in the comments and we will do the research.
One thing we’re not short of in the westcountry is rainwater and it is a shame to let it go to waste. But one look at the guttering following a heavy downpour will probably convince you that it might not be wise to use water directly from your roof for drinking.
And if you can help it, it is probably best to err on the safe side and use the rainwater than runs off your roof for alternative domestic purposes (such as watering the plants, washing clothes and bathing.)
However, as long as you are not living too close to a volcano, chemical plant or power station (especially of the nuclear variety) and providing it is treated properly after harvesting, water from your roof can be potable. In order to ensure the water from your roof can be used for drinking it is important to follow some common sense guidelines as described below:
Clean your Roof and Rainwater Goods First
While some people swear that as long as you follow the ‘First Wash’ rule (i.e. the disposing of at least the first 10 gallons of water collected), you can drink off practically any roof, it is far better to give your roof and rainwater goods a good clean before harvesting. Leaves, dirt, animal waste, insect parts, agricultural chemicals and industrial discharge are just a few of the nasties that are likely to have accumulated on a dirty roof.
But Won’t Rainwater from your Roof be Acidic?
Yes it will, but it’s unlikely to be anything to be concerned about. Acidity is measured on a pH scale where 7.0 is considered neutral and anything below this is acidic. Rainwater is unlikely to be less than 5.5 on the scale which is the range at which tooth enamel starts to erode. To put this in context, your morning cup of coffee is likely to be between 4.5 and 6.5; orange juice comes in at 3.0 to 4.0 and can of fizzy drink could be as low as 2.5!
One issue with the acidity of rainwater though is the fact that it will dissolve numerous chemicals (not to mention bird droppings) as it runs down your roof. A study from Texas found that asphalt roofs and, surprisingly, green roofs contained higher than recommended amounts of dissolved carbon (DOC) which can , under some circumstances, combine with chlorine to produce a carcinogenic (potentially cancer-causing) chemical. In an Australian study, levels of lead were also found to be slightly raised in dirty metal roofs but this was not the case if the roof had been pre-cleaned (of course, drinking rainwater from a lead roof is not recommended). Otherwise, the levels of chemicals present, even in rainwater from dirty roofs, were well below recommended levels.
Removing Biological and Chemical Contaminants from your Roof Water
Although another Australian study found no link between drinking pure, unfiltered rainwater and increased gastro-intestinal illness, you will almost certainly want to filter your harvested rainwater prior to consumption. A good quality water filter will remove debris and harmful chemicals from the water and leave it almost potable. However, filtering will not remove any harmful micro-organisms so most people will boil the filtered water before drinking it. Some filter systems claim to remove biological contaminants too, but these should be treated with some skepticism.
If you are serious about harvesting rainwater from your roof (and let’s make it clear we are NOT advocating this), installing new Aluminium flashing and rainwater goods are recommended and keeping them clean and well-maintained. To upgrade your flashing or change your roof material, get in touch with JS Cladding and Roofing for advice.
Visit this link for all the data from the Australian study.